Posted by: Phil's Classic Chevys | April 22, 2018

1947 WHIZZER MOTORBIKE

Tuesday mornings in the summer, I get together with a group of guys to share car talk and general fellowsip.  Most of the guys are Ford collectors, but they have graciously allowed me to enter their lair.  It’s a great group of guys, and I look forward to summer Tuesday mornings.

At one of our recent meetings, one of the fellows told me about a Whizzer motorbike that he owned.  I was unfamiliar with Whizzers at the time, but his description was interesting and made me want to learn more.  He said he would ride his Whizzer to the next breakfast, and he did just that.  After looking over the bike, and watching him start and ride it, I was hooked.  The thing was really cool!

As it turned out, one of the Tuesday morning guys had a friend who was a collector and expert on the bikes, and another had a restored Whizzer that he would consider selling. The first stop was a visit to the collector to become educated on what to look for and to get an idea of the value of Whizzer bikes.

Whizzer began production in 1939 as a manufacturer of a motor assembly that could be added to a regular pedal bicycle.  The original motor add-on included a pulley that was attached to the rear wheel spokes, a drive belt, and gas tank.  The total kit cost $54.95. By May of 1948, 150,000 units had been sold through 3500 dealers nationwide.

Over the years Whizzer made continuing improvements to their product, but ceased production in 1965 when competition from inexpensive imported motorcycles became overwhelming.  Reproduction Whizzers were manufactured from 1999 to 2009.  The reproductions, however, are much less valuable than the originals.

Loaded with information, I approached the Tuesday morning fellow that had a Whizzer for sale.  The bike was an original 1947 Model H mounted on a Schwinn bicycle and was in beautiful restored condition.  After a test ride, we agreed on a price, and I became a proud Whizzer owner.

332DB893-C82E-4553-B028-F5F2DF1E52E7

Shortly after getting the Whizzer home, it was suggested that it would look good mounted in the bed of the ‘55 Chevy truck.  That sounded like a neat idea to me, so I rigged up a simple mounting method that allowed me to get the bike down and ride around the neighborhood when I had the urge.

The truck and Whizzer combination is a hit wherever it appears.  Honestly, I think that, on most occasions, the bike gets more attention than the truck.

998494C7-6E90-4C06-8762-AF60CF4D0ED1.jpeg


Posted by: Phil's Classic Chevys | August 8, 2015

Gamewell Fire Box in Action

2015-08-08_1017

Posted by: Phil's Classic Chevys | August 8, 2015

A Street Corner in the Garage

2015-08-08_1018

Posted by: Phil's Classic Chevys | March 20, 2015

RE-BUILDING A CHEVY SMALL BLOCK

The Chevy small block V8 engine first appeared as a 265 cubic inch version in model year 1955.  Over the years it has powered automobiles, trucks, and boats in many configurations.  The more popular included 283, 302, 305, 307, 327, and 350 cubic inch variations.  The Chevy small block has remained true to its 16 valve, pushrod design from 1955 until the present.  It is one of the most popular, versatile, and indestructible power plants ever produced. In my garage, I have three cars with Chevy small blocks in the engine bay.  They are a 283 dual-four-barrel, 245 horsepower version in the 1957 Corvette; a 327 four-barrel, solid-lifter, high- compression, 340 horsepower engine in the 1963 Corvette; and a 350 four-barrel, cowl-induction model in the 1969 Camaro. The Chevy engine is also well known for being easy to work on. To show the ease of rebuilding the legendary small block, enjoy this video. http://www.autoblog.com/2015/03/20/chevy-small-block-v8-rebuild-video/

Posted by: Phil's Classic Chevys | March 20, 2015

THE W30 ARRIVES IN HILTON HEAD

This year’s winter project, the 1970 Olds 442 W30, arrived in mid January.  In the trunk came all the parts and tools that would be needed for our restoration work.

Before the car left home, I replaced the bumpers, front seats, headliner, and grille trim, and had the car wet sanded and buffed.  The paint work was worth the effort as the single stage Rally Red paint shone beautifully.

The car arrived shortly after my co-restorer from the previous two winters, Gene, arrived on the Island.  Gene had proven a very capable assistant in the past, and I looked forward to working with him again.  His knowledge and patience were much appreciated assets.

Our first task was installation of the rear spoiler.  Before leaving home, I had the three piece fiberglass unit painted body color.  After researching the correct location on the trunk, we carefully measured (and re-measured) then drilled the mounting holes. Fortunately our care paid off as the spoiler fit perfectly.

The installed spoiler.

The installed spoiler.

After admiring our work on the spoiler, we decided to tackle the wheels.  The Super Stock II wheels on the car were in good shape, but they were painted black, and the correct color was charcoal gray.  After removing the wheels, we unsnapped the five trim rings on each wheel, and sanded each one in preparation for painting.  The wheels were then primed and painted the factory correct charcoal gray.  All of the chrome elements were cleaned and polished and re-installed on the wheels.

Before mounting the front wheels, we cleaned the inside of the red plastic fender liners.  The red fender liners are a recognizable part of the W30 option. Cleaning them involved some experimentation that included a combination of old fashioned soapy water scrubbing and light sanding.  The finished wheels looked great, and we remounted them on the car.

Correct wheels.

Correct wheels.

Everything worked on the car with the exception of the radio, backup lights, and some of the dash lights.  We decided to tackle the backup lights.  It sounded easy, but, not surprisingly, it was more complicated than we anticipated.

The backup lights on four-speed 442s are activated by a series of three rods that run from the reverse lever on the transmission to a switch on the steering column.  The column switch also prevents removal of the ignition key unless the car was in reverse.  Except for the switch, the whole assembly was absent.

After ordering a new assembly, we laid out the parts and studied the installation instructions.  Although the work seemed relatively simple, the actual installation was quite frustrating.  Most of our difficulties were due to the very tight working area around the transmission.  Patience finally prevailed, and the installation went well.  After a few adjustments, the backup lights and ignition key release worked as designed.

IMGP1134 (2)

After much research, I found the correct working radio on eBay and we replaced the dash lights.  We also replaced the exterior door handles and quarter window trim.  The door handle replacement involved removal of the door arm rests and inside door panels to get access to the attachment studs.

The center console was then removed.  Although it was in good overall shape, it needed sprucing up.  Each piece was removed and thoroughly cleaned.  The chrome accent areas were refreshed, and new mounting screws were purchased.  The re-installed console looked great.

Spruced up interior.

Spruced up interior.

We next moved to the engine compartment.  First we removed the hood and hood hinges.  After a thorough cleaning, we painted the hood correct under-hood black and the hinges correct bare steel.  Next we removed and sanded the valve covers, and repainted them correct Olds blue.

While the valve covers were off, we cleaned the aluminum intake manifold, and cleaned and painted the exhaust manifolds. After reinstalling the valve covers we added the correct wire holders and lifting hook.  We  then masked the engine and body areas and painted the cowl and firewall.  After cleaning the red fender liners and installing a new washer bottle and decals, the engine compartment was complete.

Completed engine compartment.

Completed engine compartment.

Moving to the rear of the car, we next tackled the trunk.  Since the car did not have a spare, I found one on eBay and cleaned and painted it the correct charcoal gray.  I then had a correct bias ply tire mounted on the rim,   I also bought a jack and spare tire hold down bolt and painted the jack and base.  The trunk floor was in very good shape and only required minimal spatter paint touch up.

The  completed trunk.

The completed trunk.

With the exception of a few remaining minor items, the car was pretty much done.  It was time to take the car on a photo trip to scenic places on the island.  Here are some of those photos.

IMGP1182IMGP1153 (2)

IMGP1175 (2)IMGP1145

IMGP1119 (2)IMGP1139 (2)

Our work paid off.  With Gene’s help the car turned out great.  It was now time to enjoy the fruits of our labor.

Posted by: Phil's Classic Chevys | March 20, 2015

MUSCLE CAR CITY

While visiting friends in South Florida, I had the opportunity to visit Muscle Car City in Punta Gorda.

Muscle Car City is a private collection of classic GM cars (mostly Chevrolets) located in an old Wal Mart.  The museum is open to the public during weekdays and the cost of admission is $12.50.

The collection of cars at Muscle Car City is a must see for any car lover, but is especially interesting for classic Chevy collectors.  On display were cars from pre-war to the 1970s, including Corvettes from the mid  fifties through the 1970s, a 1969 Judge, 1970 442 W30, numerous Camaros, Chevelles, and El Caminos, early 1960s 409 Chevys, and many trucks.

As we toured the museum, we noticed a number of the cars had signs on them indicating they would be sold at auction in April.  If you have plans to visit, check their web site before making the trip.

Here are photos of some of the cars.

1931 Chevy Roadster

1931 Chevy Roadster

1957 Bel Air

1957 Bel Air

Firebird Screaming Eagle

Firebird Screaming Eagle

1959 El Camino

1959 El Camino

1927 Chevy Pedler's Wagon

1927 Chevy Pedler’s Wagon

1970 442 W30

1970 442 W30

1968 Camaro RS/SS

1968 Camaro RS/S 

1962 409

1962 409

1965 Malibu SS

1965 Malibu SS

1957 Cameo

1957 Cameo

1969 COPO Camaro

1969 COPO Camaro

1963 Split Window

1967 Corvette

Posted by: Phil's Classic Chevys | August 20, 2014

WELCOME TO NEW SITE CHANGES

The collection of cars has changed over the summer, and it has became necessary to reflect those changes on the site. The biggest difference is a movement of the collection from all Chevrolets to an inclusion of muscle cars from other GM divisions.

This slight redirection started with the acquisition of the 1969 GTO Judge last fall and has continued with the addition of a 1970 Oldsmobile 442 W30 earlier this summer.

The Judge Has a new running mate.

The Judge Has a new running mate.

The site has been updated with a new banner that shows all of the cars in the current collection. Also included are descriptions of the new additions, of which the latest is a 2015 Corvette Sting Ray comvertible.

2015 Stingray Convertible

2015 Stingray Convertible

Stay tuned, and enjoy the changes.

Posted by: Phil's Classic Chevys | April 16, 2014

THE JUDGE ARRIVES IN HILTON HEAD-PART III

Phase III-Enjoyment

After a winter of working on the Judge, Gene and I took the car out for a ride on a beautiful late winter day.  Gene brought his camera and took photos at four of Hilton Head’s many scenic locations.  The following gallery of photographs were taken at Land’s End, Coligny Beach, The Crossings Boat Launch, and Hudson’s.  Please enjoy.

 1969 PALLADIUM SILVER, PONTIAC GTO “THE JUDGE”

IMGP9315


IMGP9351


IMGP9349


IMGP9353-2


IMGP9355


IMGP9383


IMGP9387


IMGP9362


IMGP9364


IMGP9399


IMGP9385


IMGP9375


1969 PALLADIUM SILVER, PONTIAC GTO “THE JUDGE


Posted by: Phil's Classic Chevys | April 15, 2014

THE JUDGE ARRIVES IN HILTON HEAD-PART II

Phase II-Engine Compartment, Wheels, and Trunk

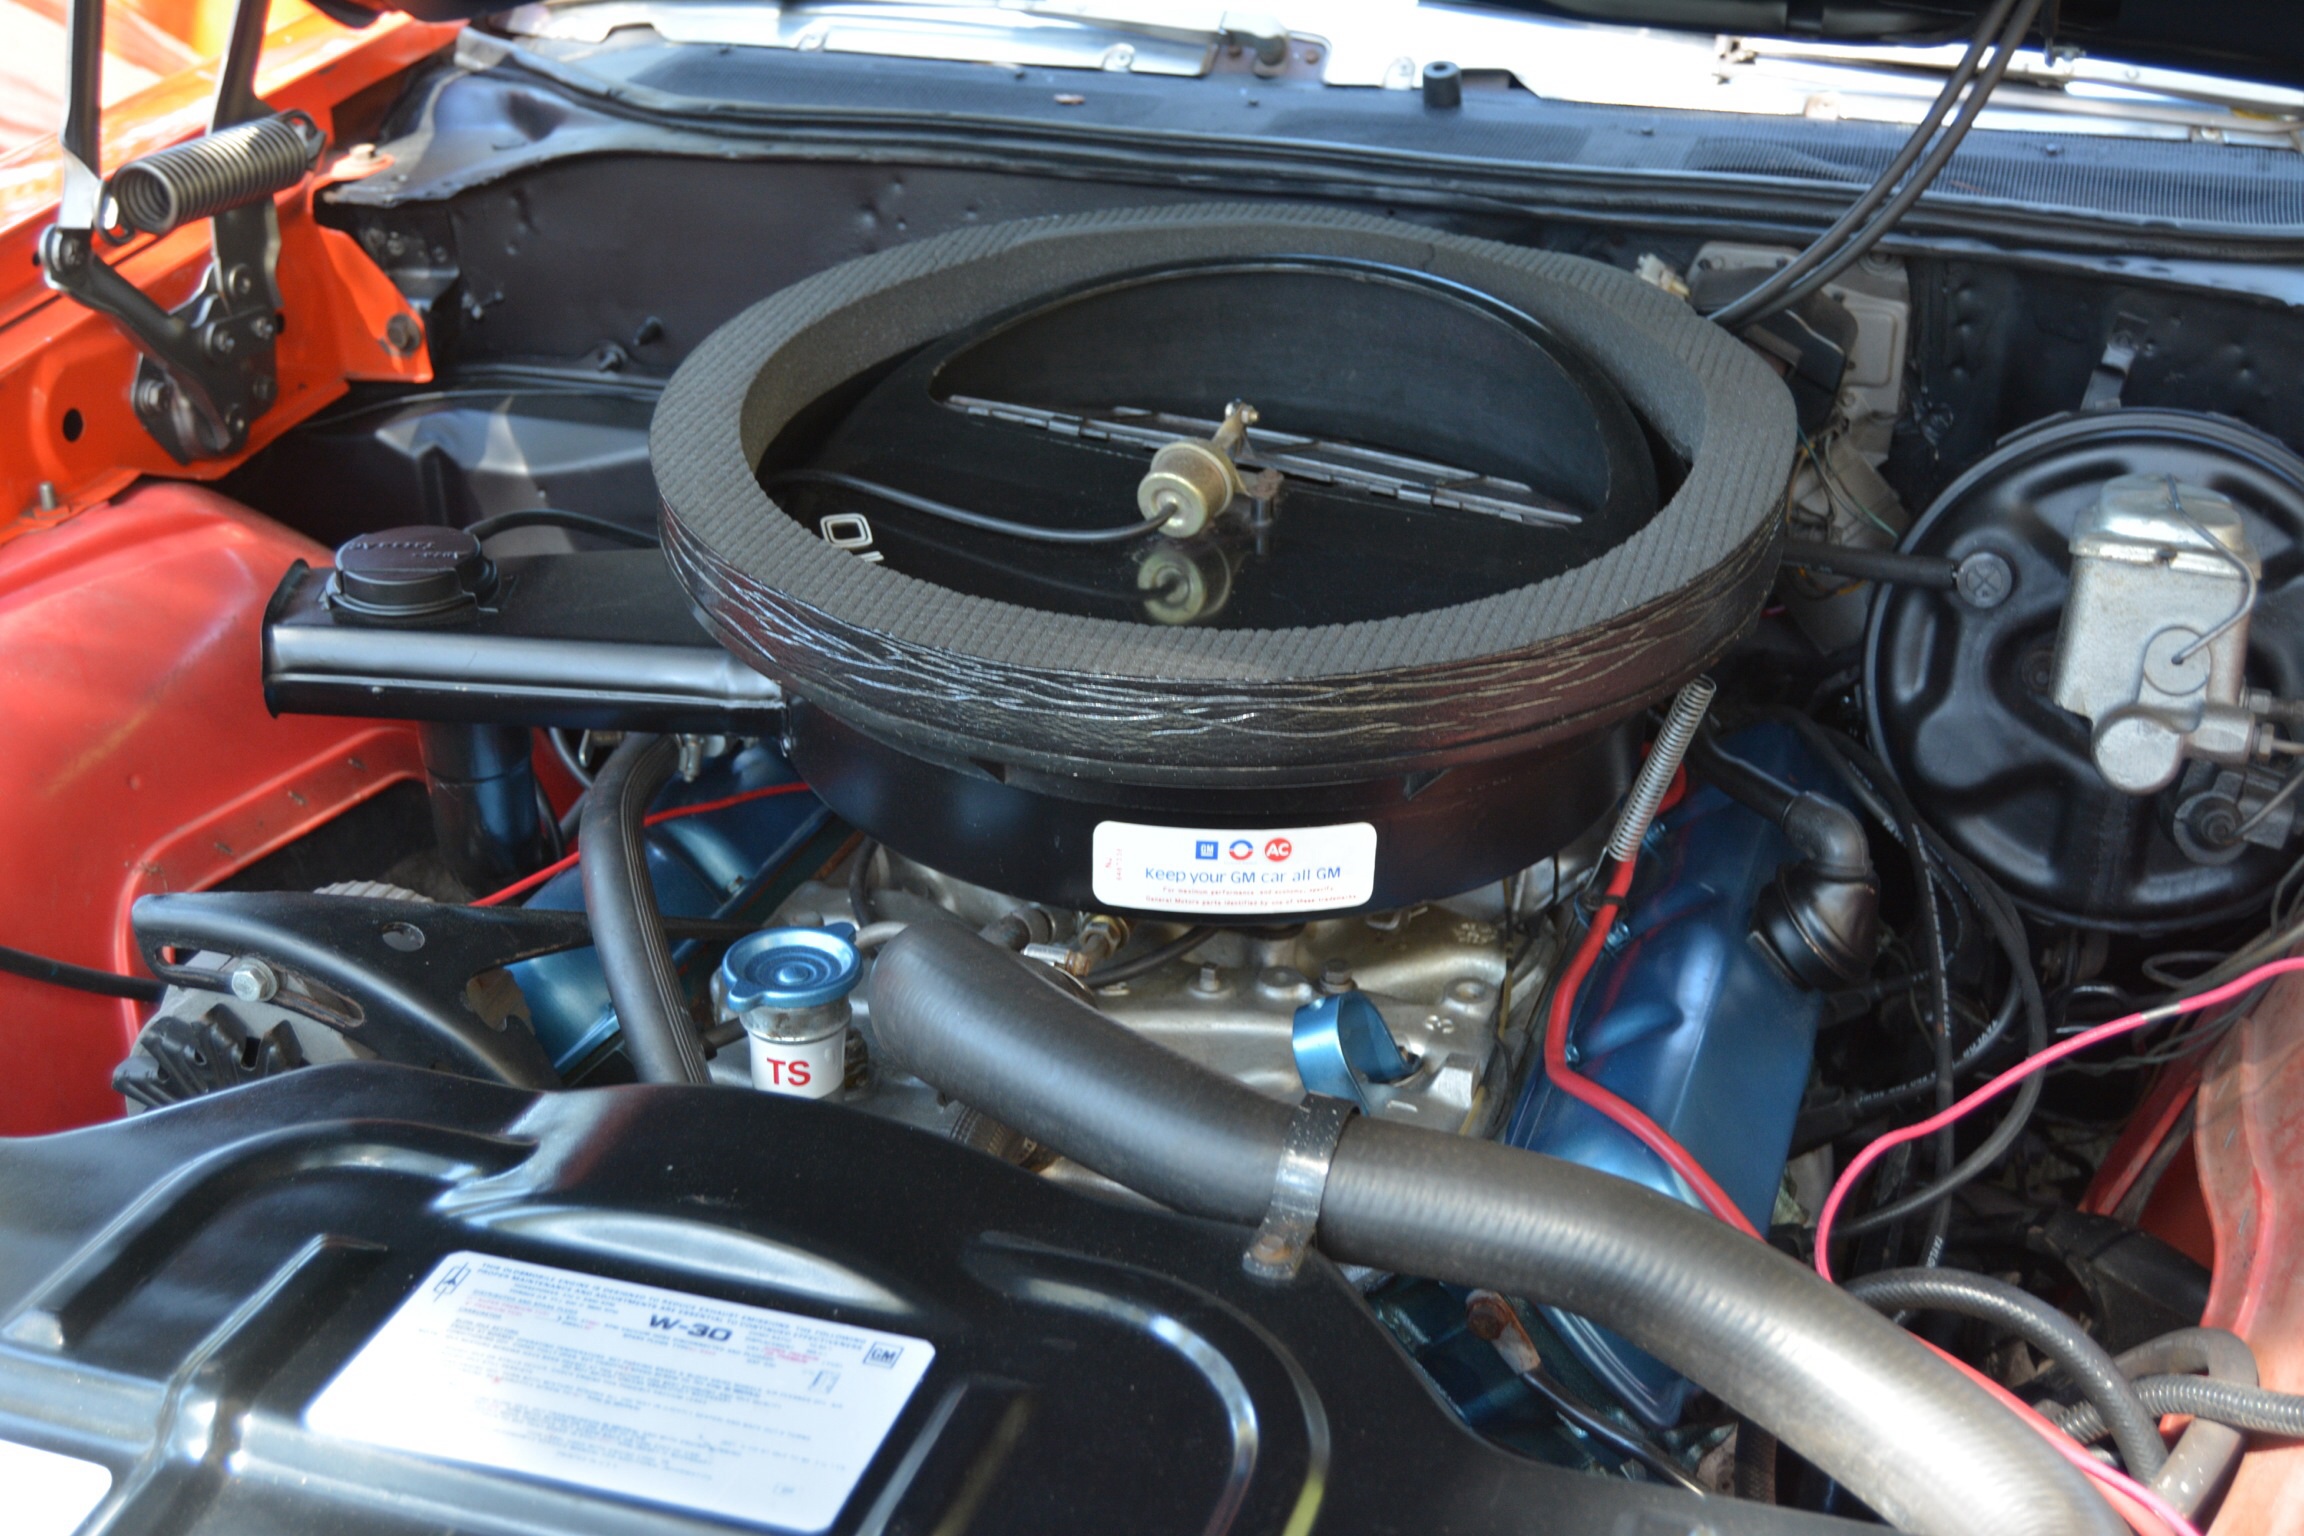
The Judge engine compartment was complete, but dirty and greasy from years of use. First on the engine refreshing  list was cleaning and de-greasing all oily components and wire brushing and sanding the remaining pieces.

To make the job easier we first removed the alternator and brackets, valve covers, distributor, coil, battery and tray, carburetor, plug wires, washer reservoir, and belts.  We also removed all of the underhood components of the Ram Air III system and the air cleaner base.   Remaining portions of the engine compartment were carefully masked to prevent over spray during repainting.

IMGP9329

The first areas addressed included sanding, priming and then painting the exposed frame members in a fresh coat of chassis black.  Next came painting the bottom of the hood in underhood black and the fan blades in semi-gloss black.  The largest components to deal with, the engine block, heads, and intake were thoroughly cleaned and painted in Pontiac engine blue followed by the exhaust manifolds receiving a fresh coat of high temp cast iron gray.  Finally, we gave the master cylinder a thin coat of cast iron paint and touched up the steering gear.  The fire wall and fender liners were cleaned and deemed very acceptable in their un-restored condition.

While out of the car, I painted the Ram Air III components in underhood black, and the alternator brackets and battery tray in semi-gloss black.  To preserve the correct look of the alternator, I masked everything but the cast casing and then gave it a light coat of flat aluminum paint.  I also cleaned and polished the original chrome valve covers.

Gene and I then reassembled all of the parts that had been removed and found special joy in the Ram Air III components. Installation of those pieces required the moves of a contortionist.  In the process we purchased new flapper bushings and a new flapper control cable.  We repainted the accelerator spring in the correct blue color (different than engine blue), and re-installed the refreshed carburetor and linkage.  Lastly, we replaced the distributor cover and installed new plug wires.

Two components missing from the engine were the exhaust heat shroud and riser pipe to the air cleaner base.  To maintain our devotion to originality, I ordered the parts from Ames Performance and we installed them on the engine.  I also ordered a new foam hood sealer and placed it on the repainted air cleaner base.

After getting everything back together, we turned the ignition switch and were rewarded with the throaty sound of a fine running 400 cubic inch Pontiac V8.  The refurbished engine compartment looked great and the car ran super.

IMGP9435


image

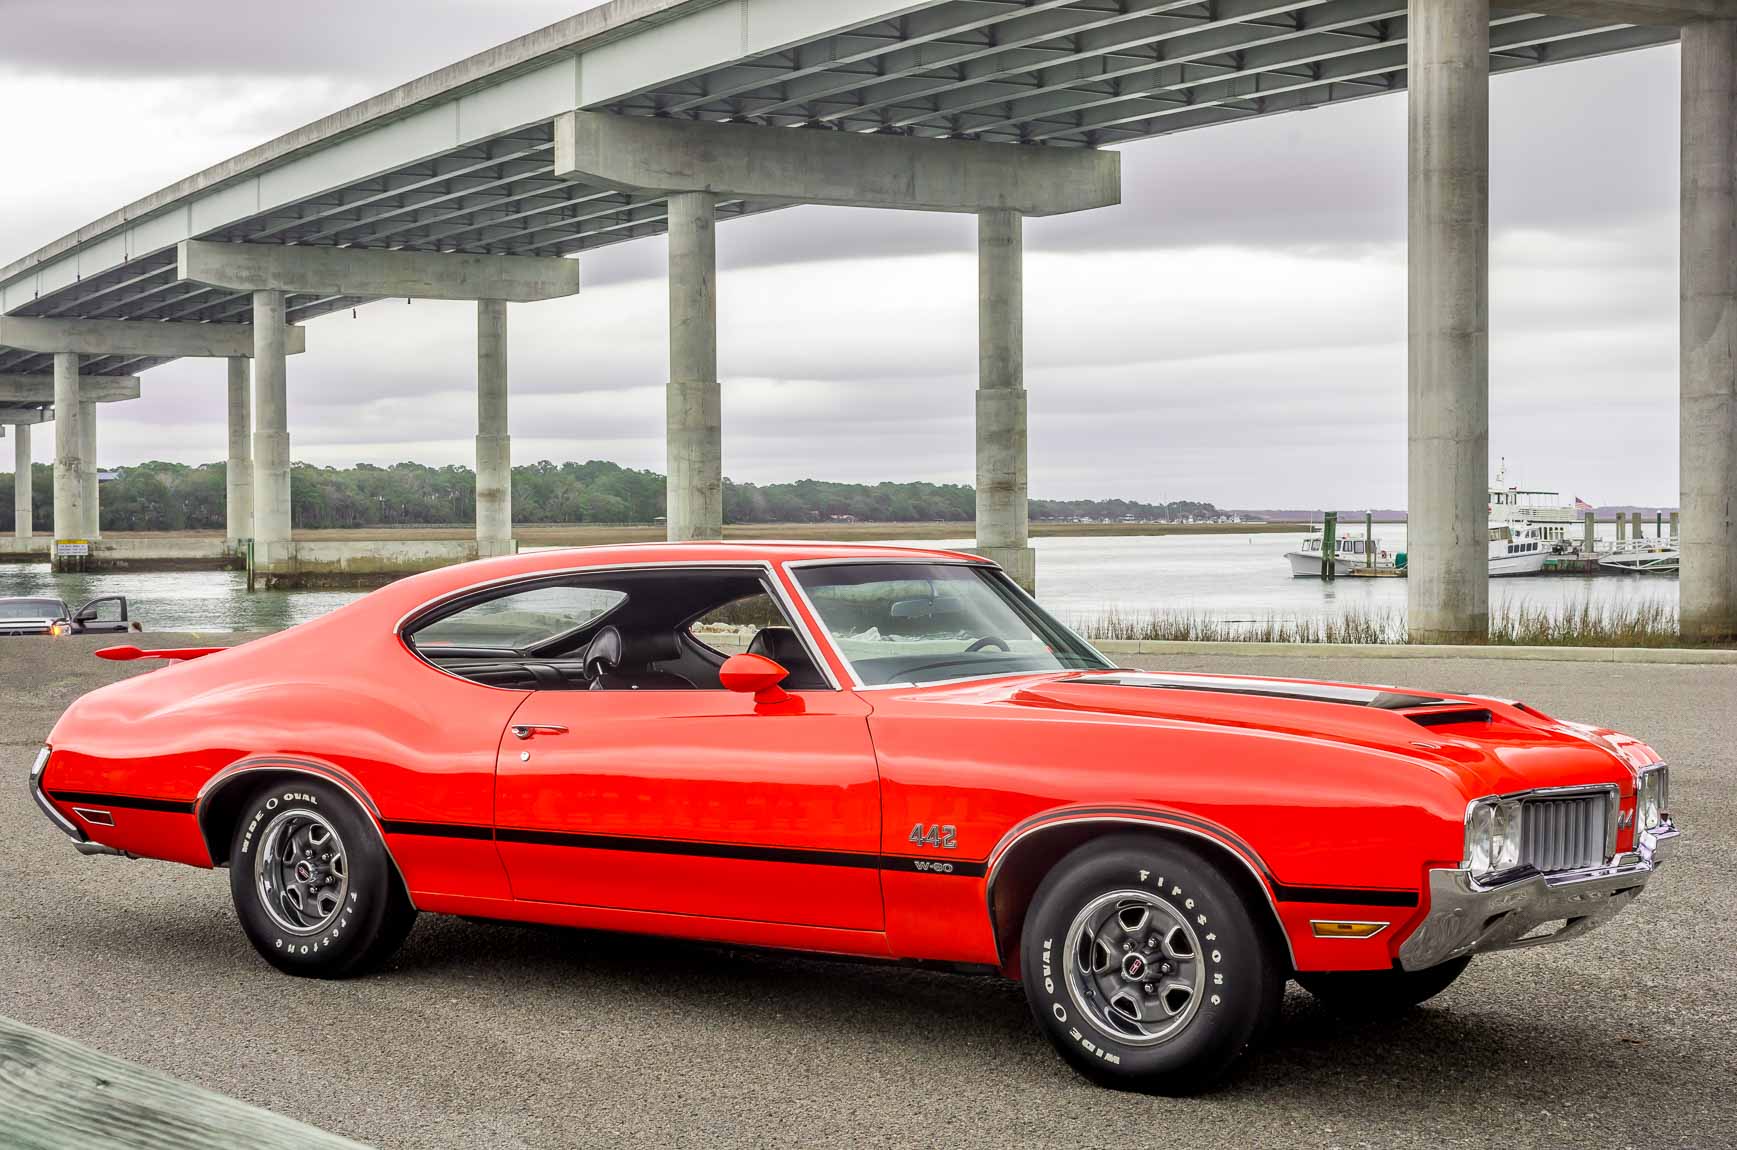
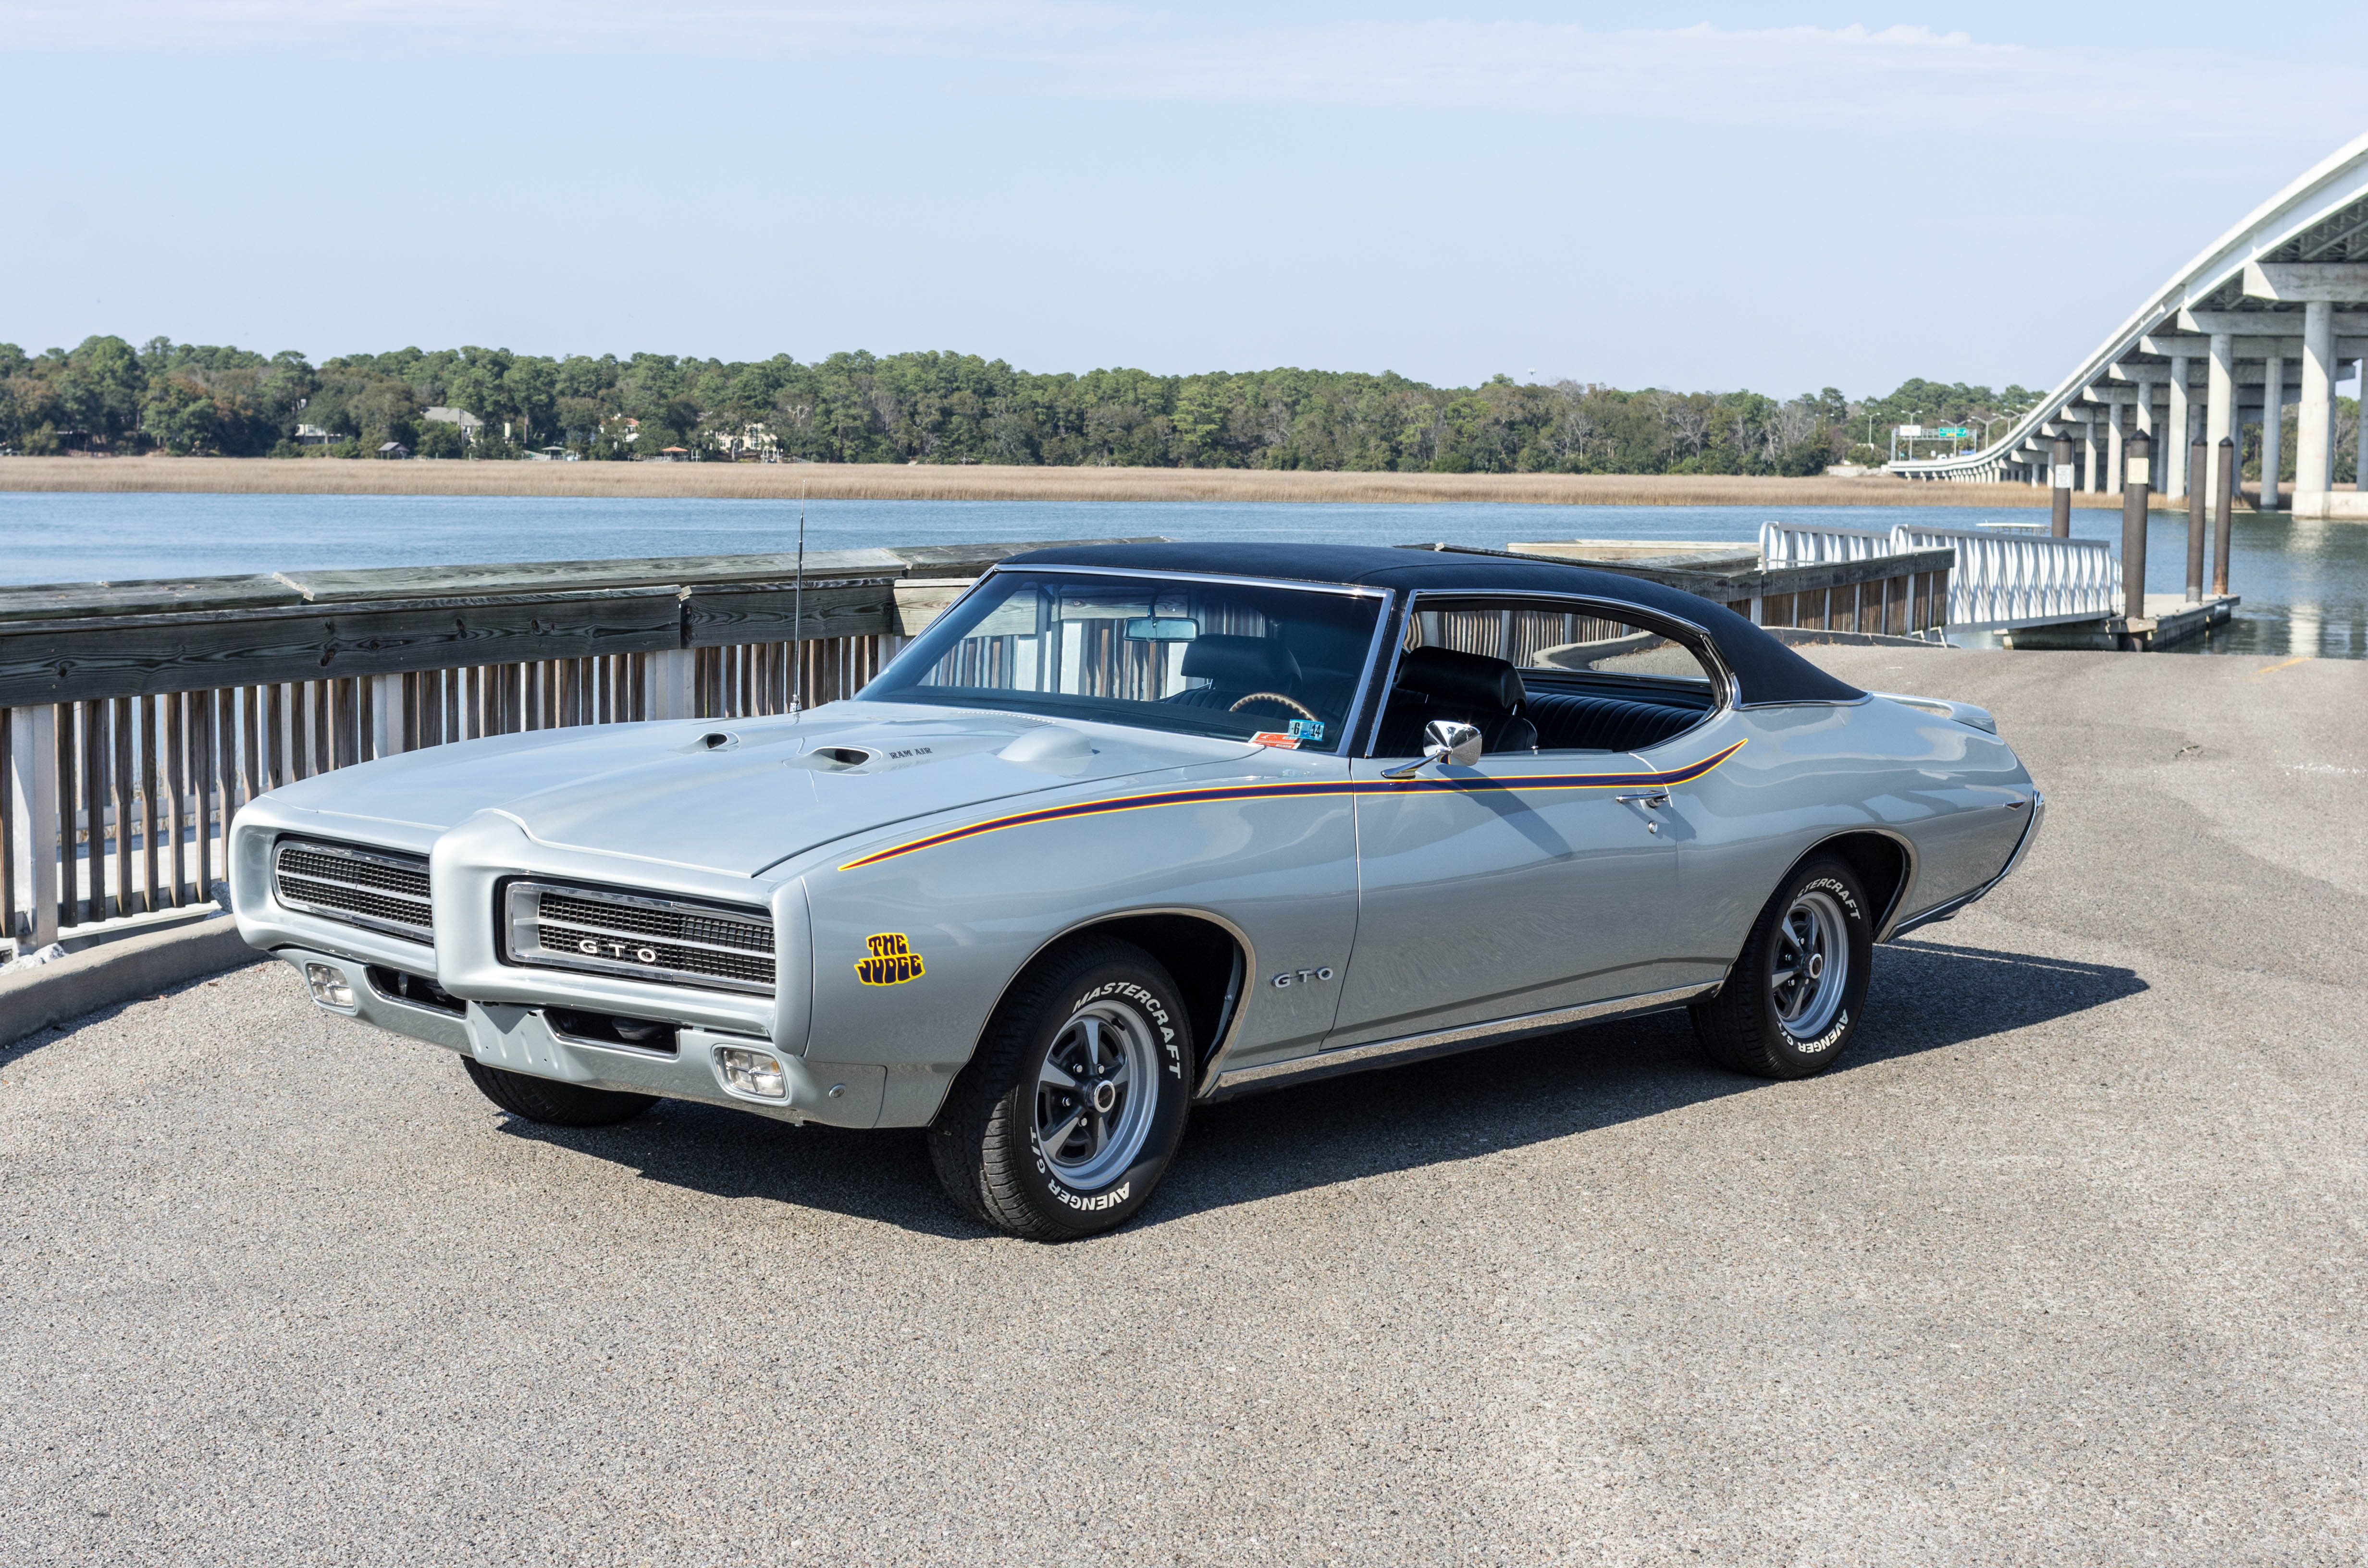
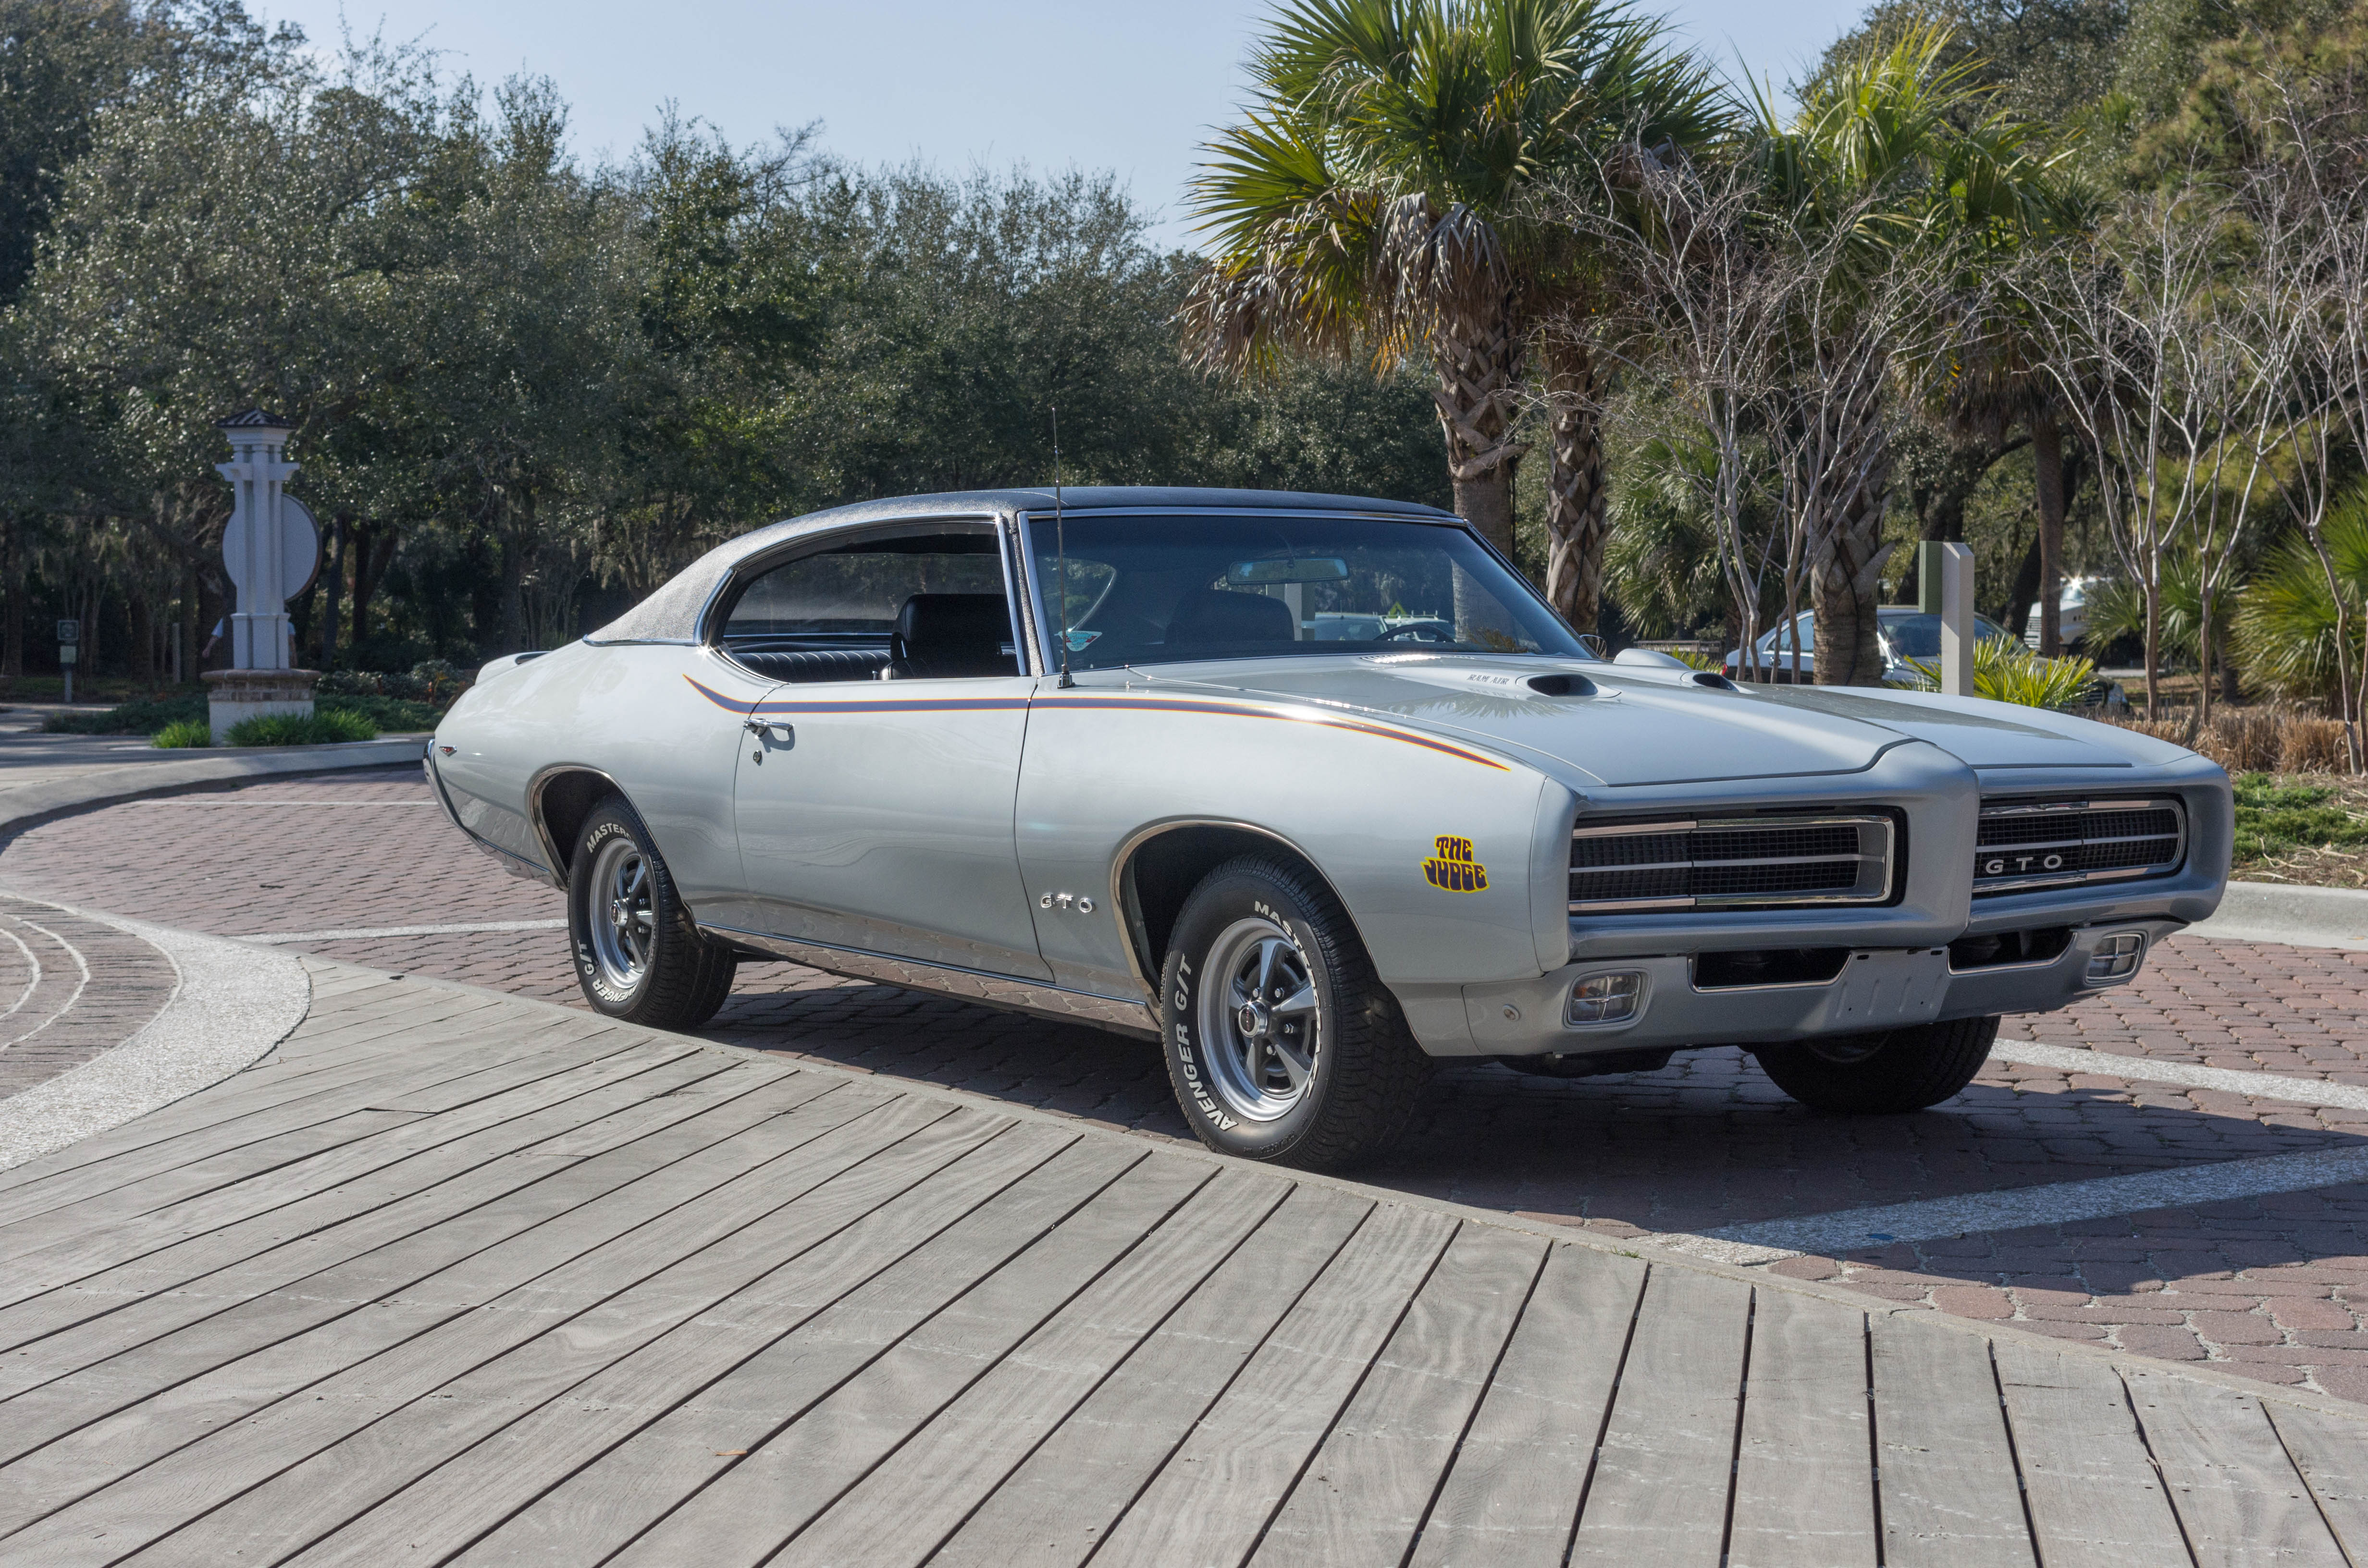
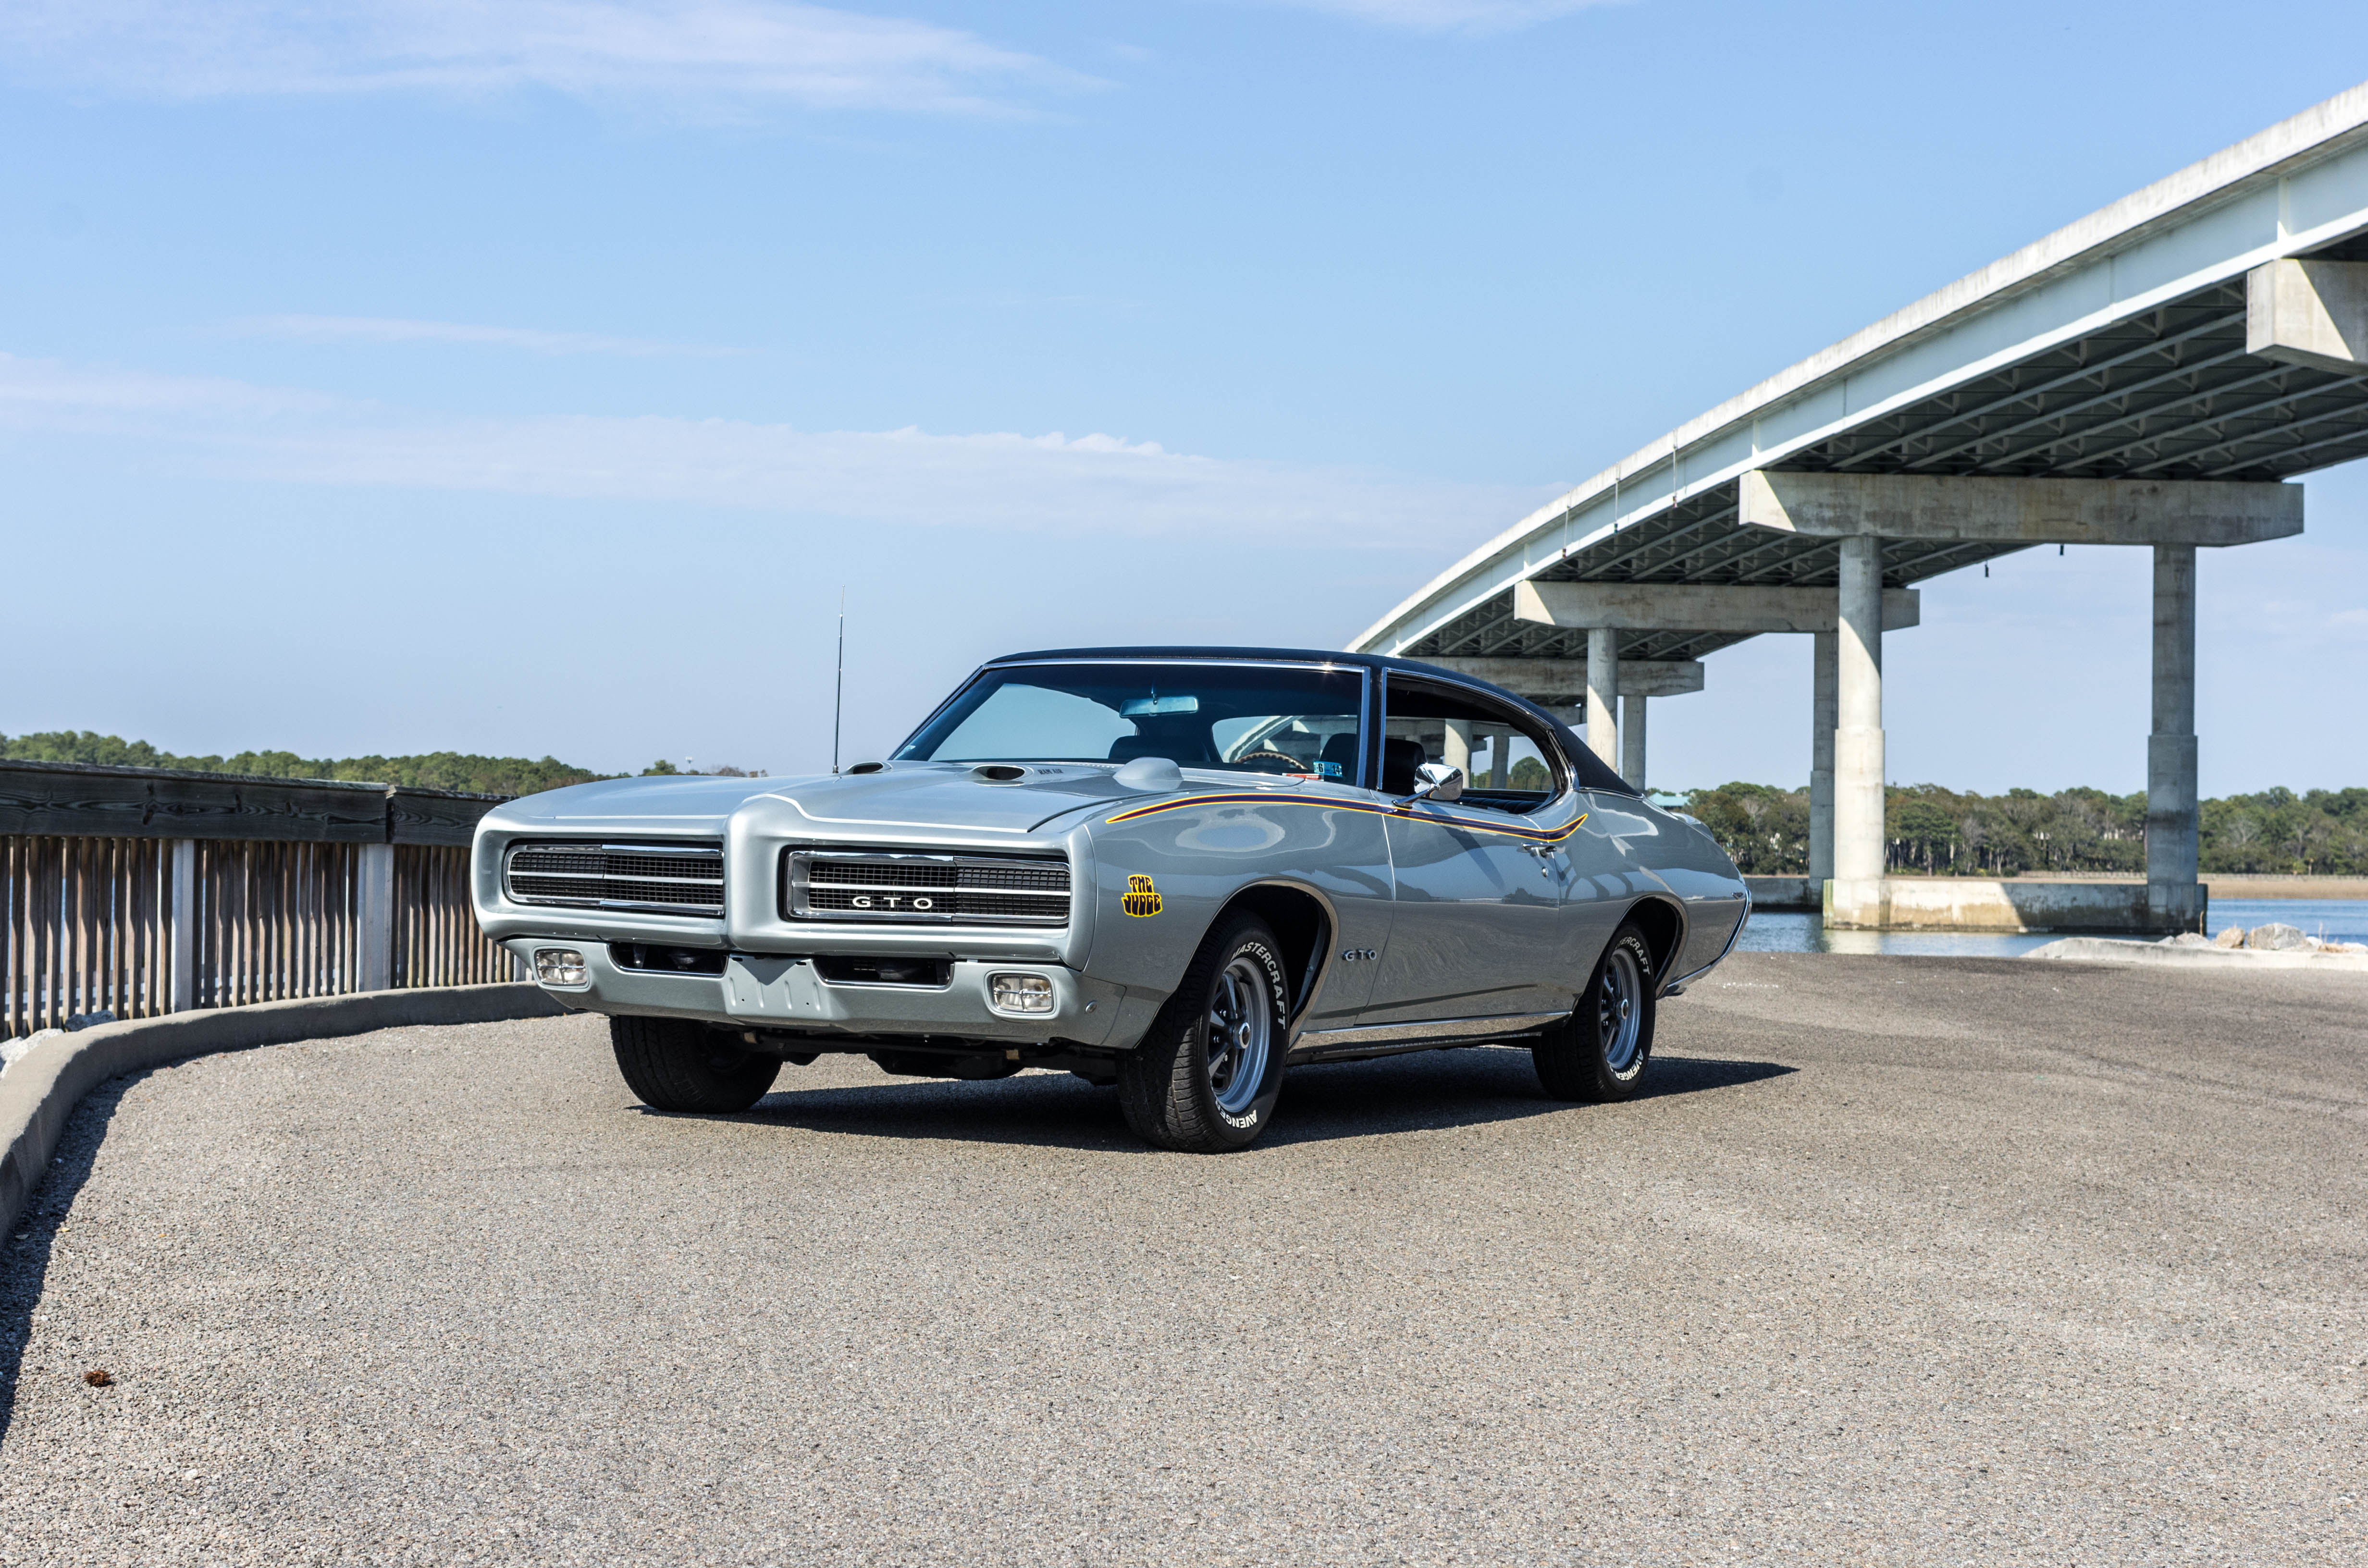
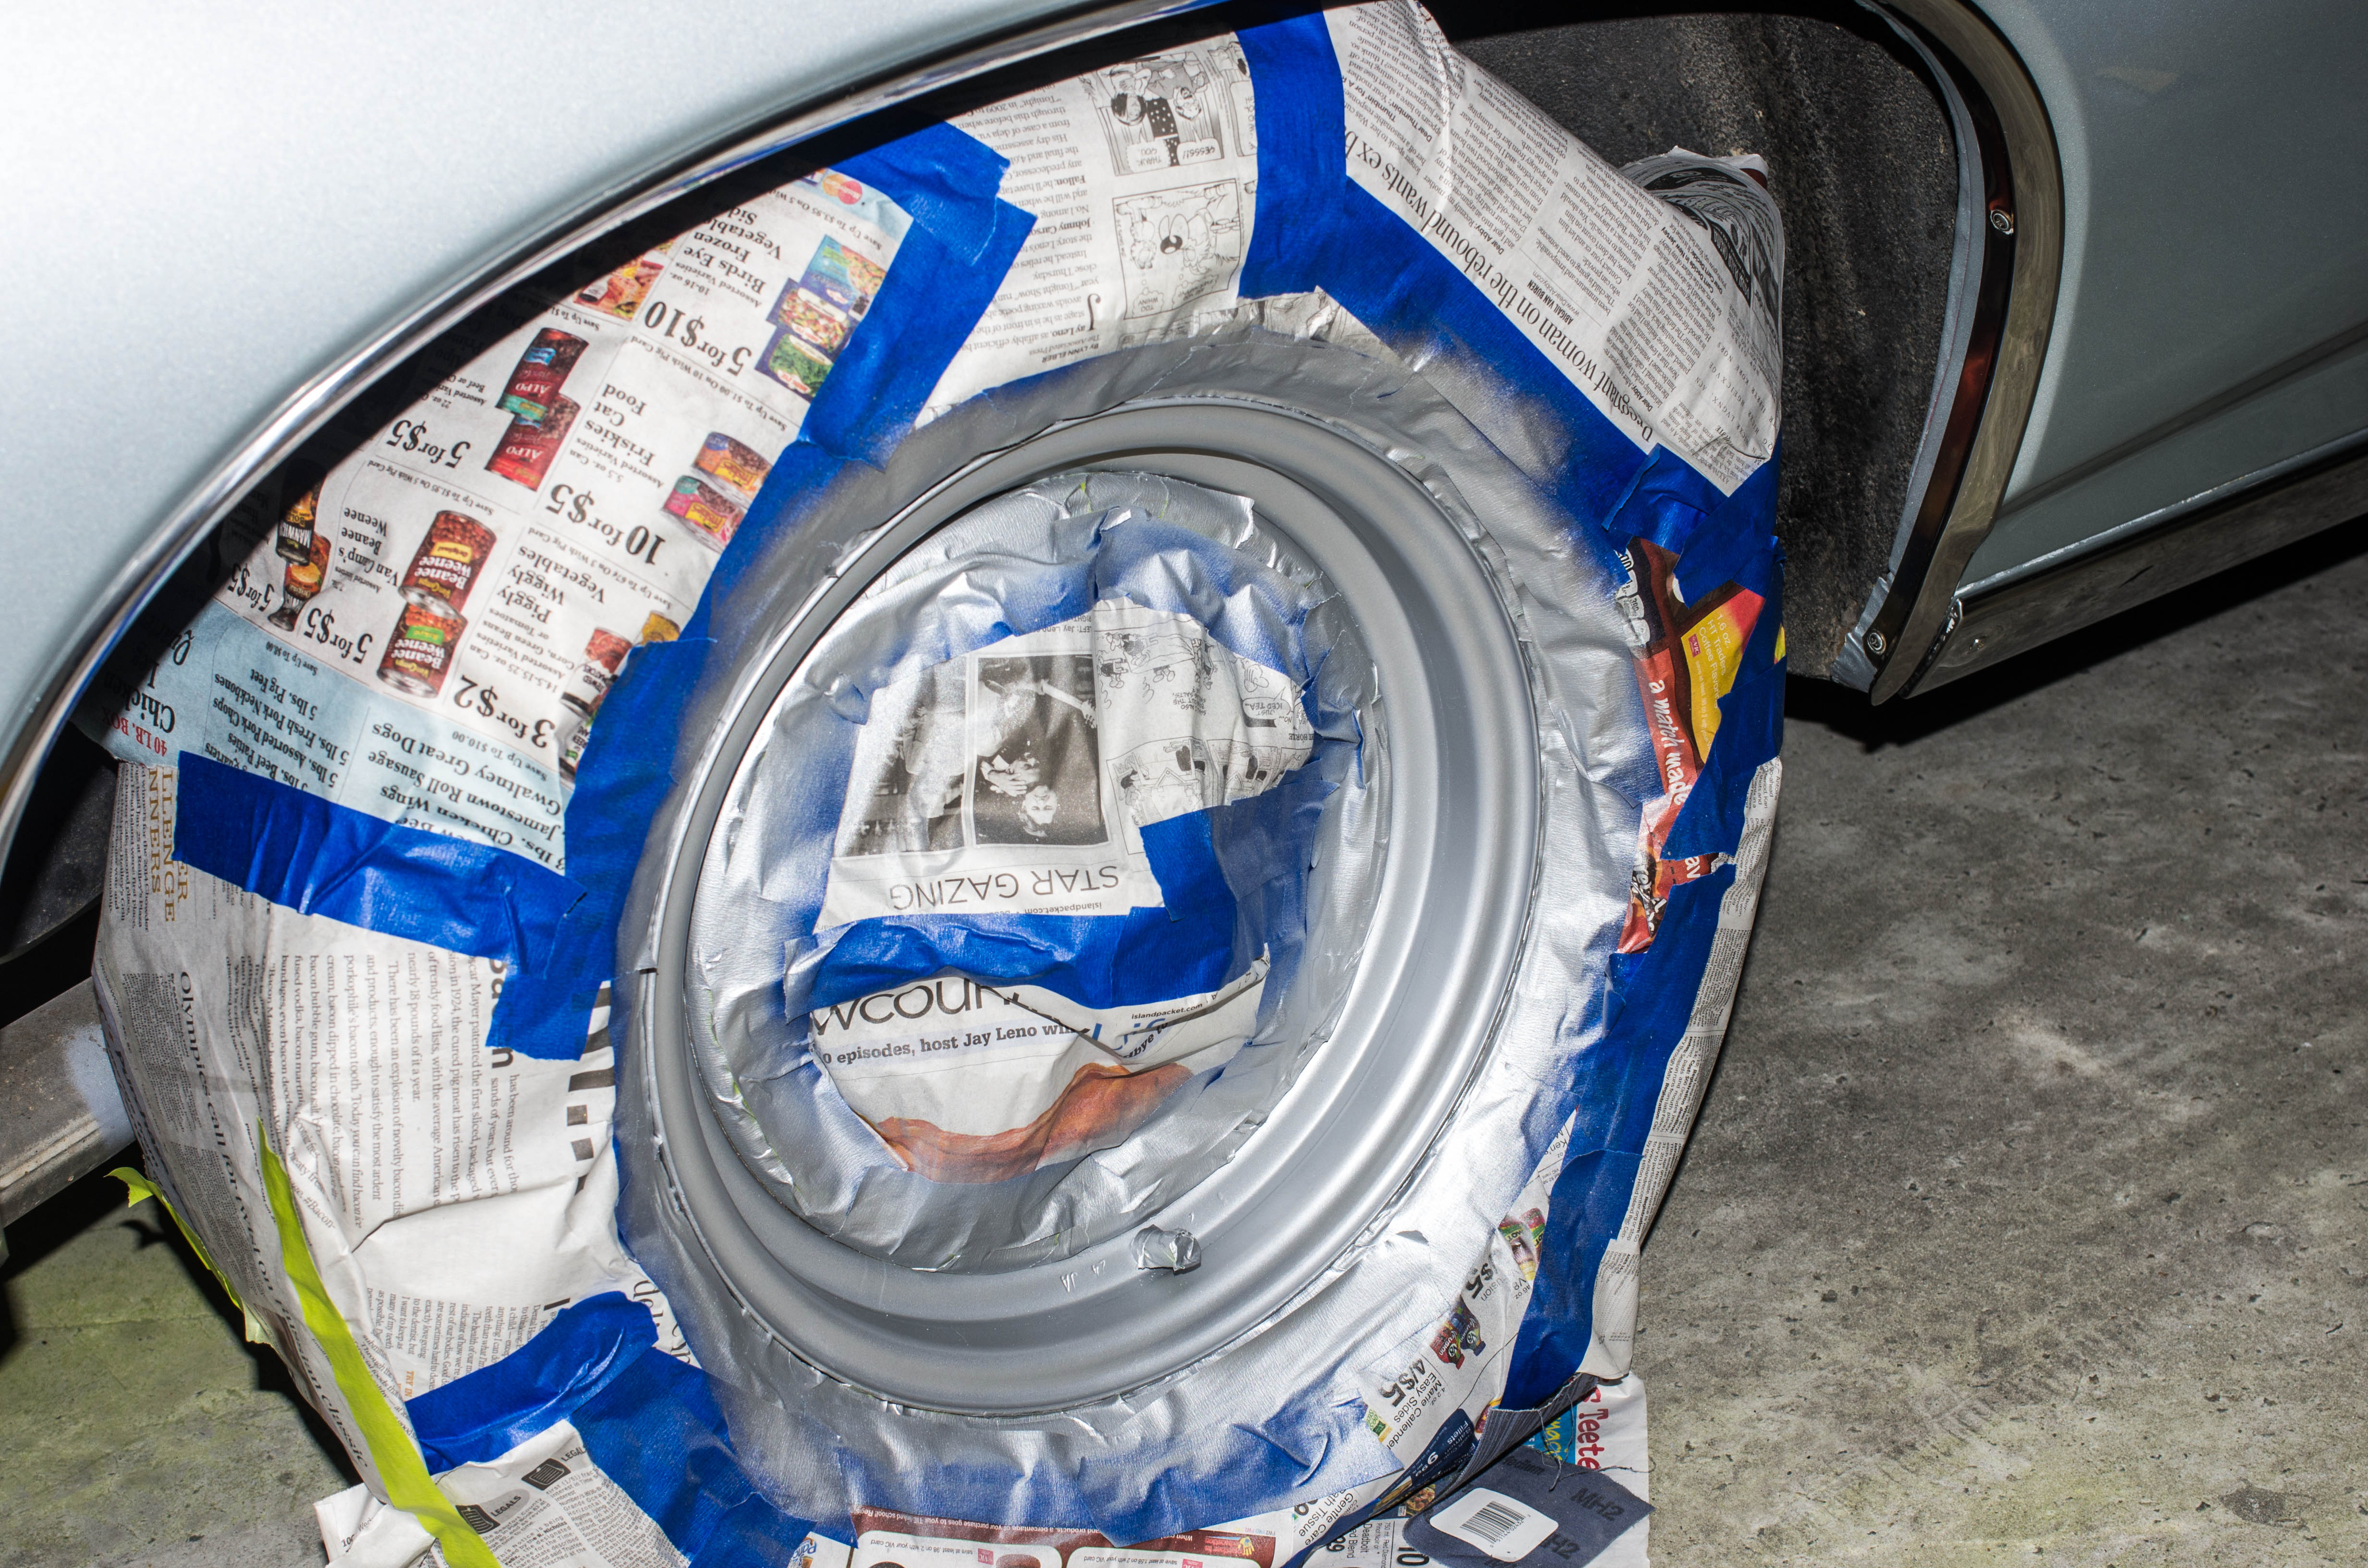
When I purchased the car the Rally II wheels had the correct JA stamps and February 1969 date codes.  The prior owner, however, had installed trim rings on the outer portion of the wheels. Although the “beauty rings” looked good, Judges came from the factory without the rings.  In fact, their absence was part of the classic Judge appearance.

Unfortunately the trim rings had left scratches in the wheels that had to be sanded down to bare metal.  After sanding, the inner part of the wheels and the tires were masked and the outer portion of the wheel was primed and sanded.  The final process involved painting the Rally IIs in correct Argent Silver paint.  The finished product looked factory fresh, and the bare look of the wheels grew on us as time passed.

IMGP9346

image

The last item on the winter agenda involved cleaning and repainting the trunk.

The trunk work began with removing the spare tire, jack components, tail light housings, and trunk mat.  Close inspection of the trunk floor showed it to be in very good shape.  Before painting could begin it was necessary to clean, wire brush, and sand all the areas of the trunk that would be painted.

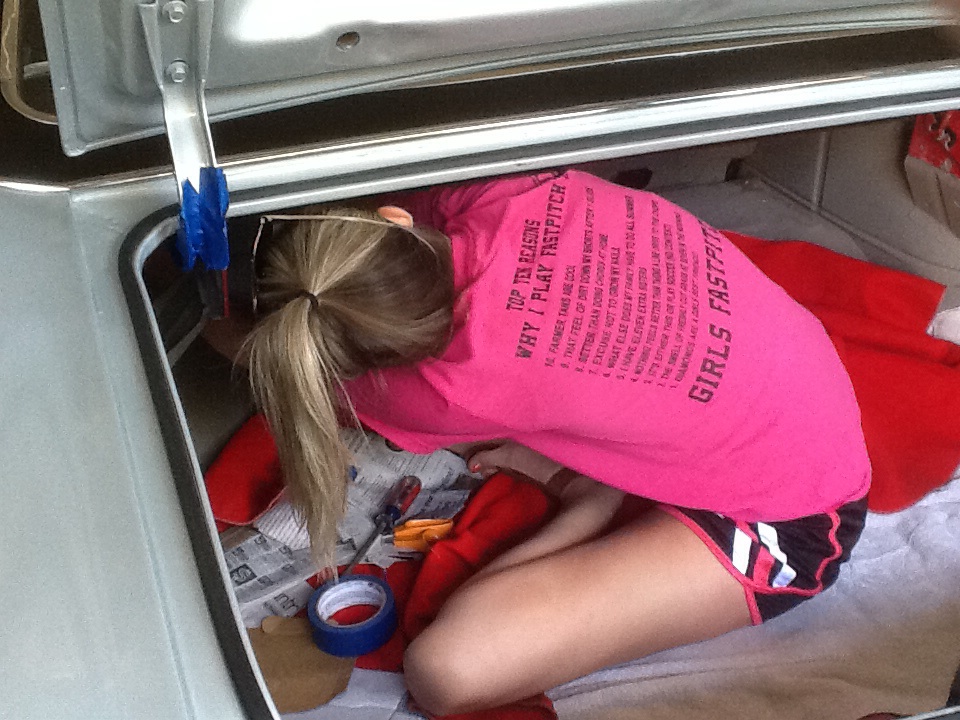
Before painting could begin, however, we needed to mask holes in the rear trunk wall behind the rear seat and the underside of the package shelf.  Had I crawled into the trunk and masked those areas myself, I may not have been able to get out.  Fortunately I was able to recruit my very limber 25 year old niece to take care of the difficult masking.  She did a good job, and we were soon ready to apply the correct black/aqua spatter paint trunk finish.

image

The painting initially went fine, but an oily substance soon appeared through the new paint on the floor areas that were previously covered by the mat.  Closer inspection showed a tarry coating that may have been a sound deadener or adhesive for the trunk mat.  No amount of sealing and repainting worked, so it became necessary to remove all of the petroleum based substance before painting the floor.  It was not the most enjoyable part of the restoration, but it eventually turned out fine.  A finish coat of clear sealer over the spatter paint completed the trunk restoration.

Before replacing the jack and base into the trunk, I cleaned and painted them the correct Pontiac blue jack paint.  I don’t know why Pontiac chose blue for those components, but, again, in the interest of accuracy, I painted them them the correct blue color. Finally, I replaced the original trunk mat with a new one and installed the spare tire.  The trunk turned out great.

Our winter’s work was now complete.  It was time to ship the car back to Ohio and have a summer’s worth of enjoyment.

image

Posted by: Phil's Classic Chevys | January 31, 2014

THE JUDGE ARRIVES IN HILTON HEAD

PHASE I – HEADLIGHTS, BACK UP LIGHTS AND KICK PANELS

A week or so after arriving at our winter destination, I had the Judge shipped down from home.  It was time to tackle the list of small items that would make the car a quality restoration.

Fortunately, a short time before the car arrived, Gene, my car knowledgeable friend from last winter’s Camaro project, also arrived. Gene had proven to be a invaluable addition whose considerable skills were very welcome.  My impression, mostly gathered from his wife, was that Gene also looked forward to our afternoon sessions.

We decided to first tackle the balky driver’s side headlight door.  After removing the two piece grille, we removed the vacuum hoses and checked for correct vacuum.  Moving the headlight switch between the on and off positions showed seventeen inches of vacuum alternating between the two hoses.  It was clear that the problem was in the actuator, so I ordered a new actuator from Ames Performance.

While waiting for the actuator, we tackled the non-functioning backup lights.  In order to pass the annual Pennsylvania inspection, the previous owner had installed a toggle switch under the dash to activate the lights.  Although this may have been an acceptable way to get through the test, it was certainly not what the factory delivered.  Since it was much easier to work on the car on the lift, I purchased the correct switch and installed it on the transmission before the car was shipped from home.

Our job now was to wire the new switch.  After carefully checking the car’s wiring diagram and field testing the chosen wires, we ran them under the carpeting and connected the backup light switch into the circuit.  With the ignition in the on position, we checked the operation of the switch and found that it worked great when manually pushing in the plunger.  With a little adjustment of the switch, we were able to get it working as designed when the transmission was shifted into reverse.

image

The original kick panels on the car were brittle and had been further damaged during removal for painting the door jambs.  I ordered new ones, and, while waiting, went on line to get advice on installation.  Unfortunately, to my surprise, nearly all of the posts on the subject spoke rather negatively of the whole experience.  This apparently wasn’t going to be a lot of fun.

After receiving the new panels and gathering sufficient courage, we decided to tackle the passenger’s side first.  That one appeared to be the more straight forward and the easier of the two.  We felt it was important not to destroy our confidence this early in the restoration.

The first step was to remove the grille that covers the air opening.  It easily snapped out and exposed five screws that held the kick panel to the car.  After removing the screws, it was necessary to detach the two cables that control the upper and lower vents. After successfully disconnecting the cables, we removed the panel.  What should have been fairly straight forward ended up being quite a struggle.  The air vent opening had been very heavily sealed with a tar-like adhesive/sealer.  It took a considerable amount of pulling and twisting and ultimately breaking the old panel into pieces to finally get it out.  All of our frustrations were compounded by the need to contort ourselves to get to the kick panels.  Hindsight being 20/20, it would have been a good idea to remove the passenger’s seat before tackling this part of the project.

After cleaning the caked sealer from the body, we coated the area with silicon adhesive/sealer and reversed the removal process. With a little twisting and pushing we were able to get the new kick panel positioned properly.  It was now time to take on what was clearly the more difficult of the two panels.

The on-line discussions had indicated that, when replacing  the driver’s side kick panel, it would be a good idea to first remove the parking brake pedal and the dimmer switch.  After dutifully following that advice, and removing the driver’s seat, we still had to tear the old panel into pieces to get it out.  The old adhesive/sealer was a formidable obstacle in removal.

Replacing the driver’s kick panel proved to be little more problematic than the passenger’s side.  Even with the parking brake and dimmer switch out of the way, it was a struggle to get it to pop into place.  With silicon adhesive on our bloodied hands, and with impure words emanating from our mouths, we finally got the panel into place.  The next car chosen for restoration will have good kick panels to start with.

image

The new headlight door actuator arrived while we were working on the kick panels, and we immediately installed it and replaced the grille.  The headlight doors worked just as they were intended.  Our confidence and enjoyment had returned!  Now it was time to move on to the other items on our list.

image

Older Posts »

Categories